Let’s face it: Facebook generates its revenue by renting its audience to businesses and charging them for Facebook ads.
Businesses have historically relied on creating meaningful content that created engagement from users in the form of Likes, Comments/Replies, and Shares. This is what is known as achieving Organic Reach. As users engaged with more organic content from a business’s Facebook Pages, the user’s news feed drifted toward more business content that Facebook was not adequately monetizing, and was polluting a user’s news feed with more shock-value filled content intended to trigger more user engagement.
A few years ago, Facebook took a hard look at itself and recognized that what users really wanted was more content from friends and family, and less from businesses- including news sources. Therefore, Facebook changed its news feed algorithm to place a higher priority on engagement to and from Facebook Profiles (User), and less priority on engagements to and from Facebook Pages (Business). This change in emphasis led to the decline of organic content produced by businesses reaching a user’s news feed. This forced businesses with a Facebook Page to turn to Facebook ads if they wanted to get their brand back in front of users.
Today, Facebook is encouraging marketers to look at their fan base as a way to make paid advertising more effective, rather than using it as a free broadcasting channel.
So how does a small business get started creating Facebook ads to get their content in front of an audience? To get started with Facebook ads, first, you will want to set up a Facebook Business Manager account.
Facebook Business Manager account
As a small business owner, your time is limited. Many small business owners engage a freelancer or family member to assist them in their Facebook marketing efforts. With a Facebook Business Manager account, you have one Facebook ad account that multiple people can access. The business owner can assign each member of their team certain privileges based on their specific role. Moreover, Facebook Business Manager can provide business-level insights on ads.
The following link from AdEspresso is a nice guide to help you set up your Facebook Business Manager account. Once set up, you can simply access your Facebook Business Manager Account by typing “business.facebook.com/”, or adding a bookmark to the navigation/bookmark bar of your browser like I do.
The first step- once you login to Facebook Business Manager is to add your Facebook Page. Once your Facebook Page is added, you can set up your Ad Account.
Facebook uses what are known as Pixels to gather information about users and their actions with the business’s website so that you can create better Facebook ads. Each Facebook Pixel applies to one website and one Facebook Ad account. If you have several websites, you will want to have a different pixel for each website and a different Facebook Ad account for each website so, the data collected for each website and their ad campaigns are kept separate.
As the business owner, when you create your new ad account add yourself and your permissions. You will also have to set up the payment method to pay for any ads that you run. As the business owner, you will also usually be the Business Manager account owner. However, Facebook Business Manager also allows an ad agency to manage multiple accounts, and they will have a completely different user interface that is beyond the scope of this post. When it comes to your ad account you can also link not only your Facebook Page but your Instagram Page to your ad account as well since Facebook owns Instagram.
Ad Manager
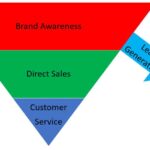
Now that you have completed all your basic Business Settings, it is time to create an ad. Under the menu, select Ad Manager. The first step is to choose your objective. Facebook ads categorize your objectives into three main categories- Awareness, Consideration, and Conversions.
Objectives:
The Facebook Ad Manager uses these three main categories to organize the different objectives you can choose from when creating an ad that follows a typical sales funnel.
Awareness Objectives:
- Brand Awareness– Increase awareness for your brand by reaching people who are more likely to be interested in it
- Reach– Show your ad to the maximum number of people
Consideration Objectives:
- Traffic– Send more people to a destination such as a website, app or Messenger conversation
- Engagement– Get more post engagements, Page likes, event responses or offer claims.
- App Installs- Get more people to install your app
- Video Views- Get more people to view your video
- Lead Generation– Drive more sales leads, such as email addresses, from people interested in your brand or business
- Messages– Get more people to send messages to your business in Messenger or WhatsApp.
Conversion Objectives:
- Conversions– Drive valuable actions on your website, app or in Messenger.
- Catalog Sales– Create ads that automatically show items from your catalog based on your target audience.
- Store Traffic– Drive visits to your physical stores by showing ads to people who are nearby.
Once you choose your objective, you will have the opportunity to link it to your Ad Account. Next, you will have the opportunity to choose the audience that Facebook will target. Options include location, age, and gender, as well as more detailed targeting options, such as Demographics, Interests, and Behaviors.
Once you have selected your audience, you can select your budget and schedule. At its highest level, you can select to buy impressions or clicks.
Impressions
An impression will present your ads to your selected audience. If the ad appeals to the user, they may click on the ad; if not, it still counts as an impression. You buy impressions in lots of 1,000. This option is referred by the acronym CPM, which stands for Cost Per 1000 (M being the Roman numeral for 1,000) If you have a high performing ad- such as if you are giving something of value for free and you have right audience- you can usually get a higher Return On Investment (ROI) from buying impressions.
Click-Throughs
The other option is buying click-through links. This option is referred by the acronym CPC, which stands for Cost Per Click. Facebook figures that a user following a link to a landing page is far more valuable than just providing the user with an impression, so it charges more. With CPC, you are essentially buying a guarantee that the user will make it to your landing page. However, that just means that Facebook will send them the landing page of your choosing. If the landing page does not make the user take an action, you’ve paid for the traffic anyway.
Therefore, if you have a good Facebook ad that has been optimized to get conversions, you are likely better off buying impressions. If you have an external landing page that has been optimized to convert users to customers and you do not want to run the risk that your Facebook ad will not generate traffic, then you may want to consider buying click-throughs.
Are you prepared to get started with Facebook ads?
This post is part of a series. Be sure to check out the other post in this series.
I would like to acknowledge Andrea Palten Marketing and Business Coach with AndreaPalten.com for her gracious assistance as a reviewer to make sure that all of the content in the post was accurate.


